Problemi riconoscimento SSD M.2 per PC Dell
Articolo originale:
https://jasoncoltrin.com/2018/02/09/how-to-clone-a-dell-optiplex-7050-m-2-nvme-hard-drive-with-clonezilla-and-an-external-usb-hdd/
8. Power on the Source computer and start mashing the F12 key on the keyboard to get to the one-time boot menu.
9. Before we begin, we need to make sure clonezilla can find our NVME HDD. By default UEFI and Secure Boot will be enabled. We need to disable these as well as Boot Path Security so that we can continue.
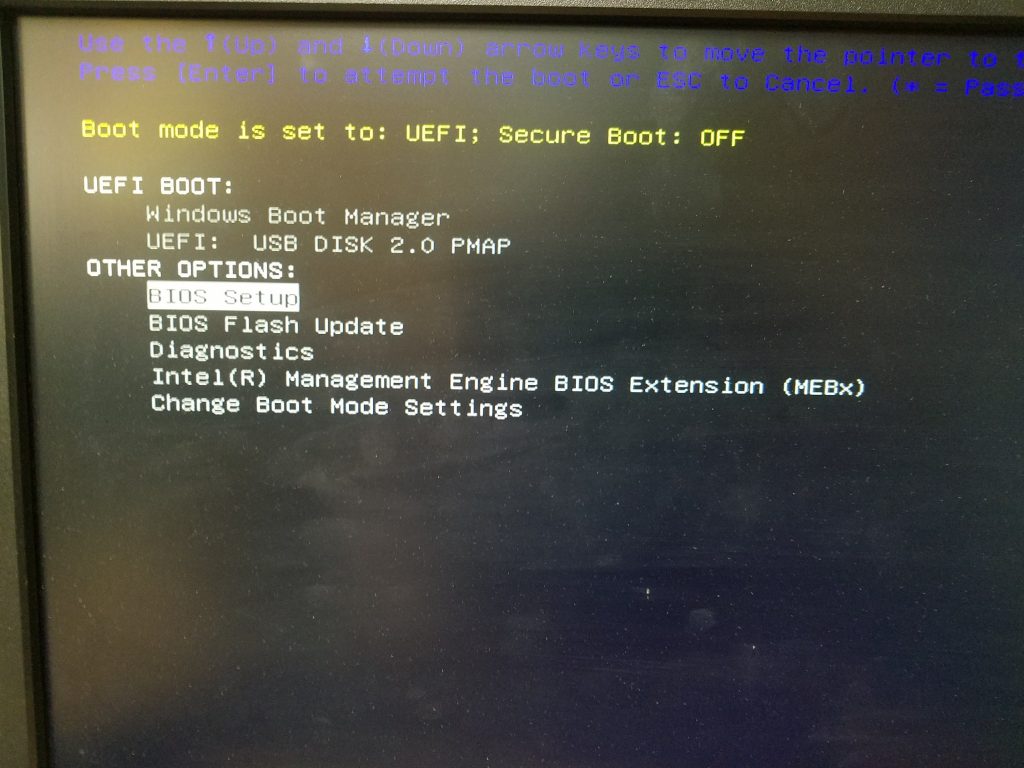
10. Select Setup from the Boot Menu:
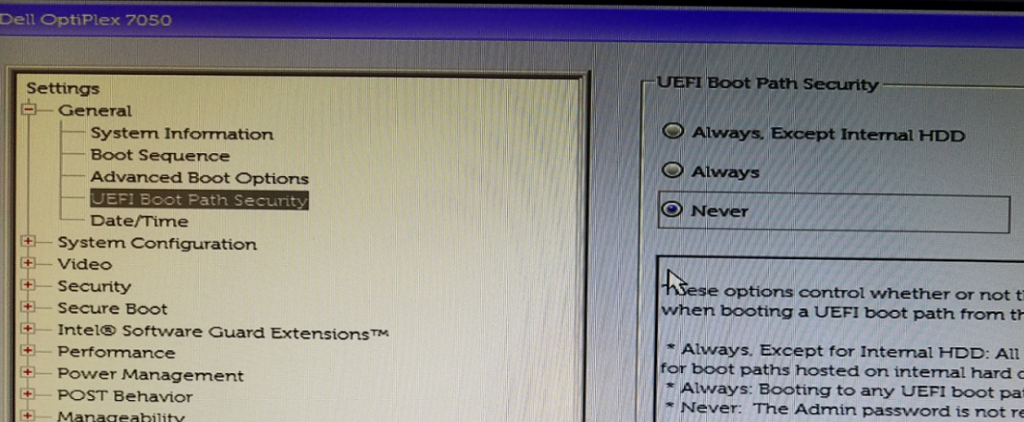
11. In the BIOS, under the General Heading, select UEFI Boot Path Security and change it from Always to Never.
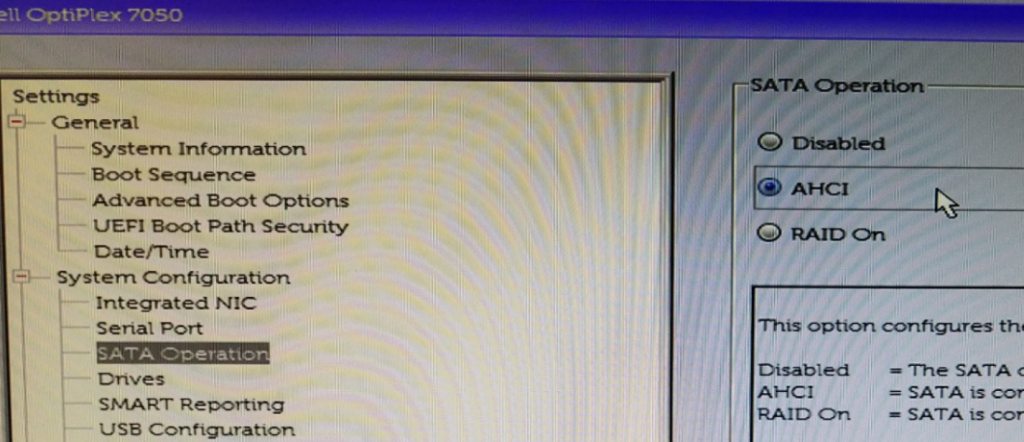
12. Next change System Configuration > SATA Operation from RAID On to AHCI
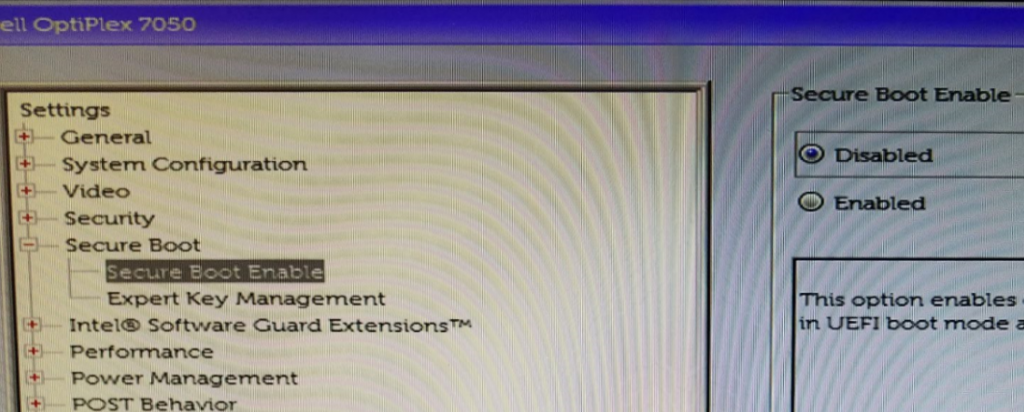
13. Lastly, change Secure Boot > Secure Boot Enable “Enabled” to “Disabled”
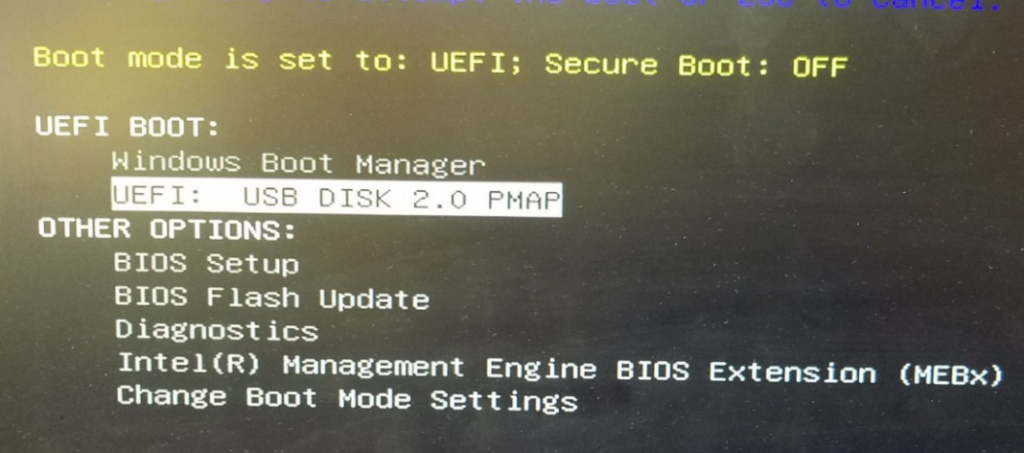
Apply, Save and Exit the BIOS. On the next boot, start mashing the F12 key again and this time select UEFI: USB DISK 2.0 PMAP
Clonezilla will boot from the USB drive so choose the default (hit Enter):

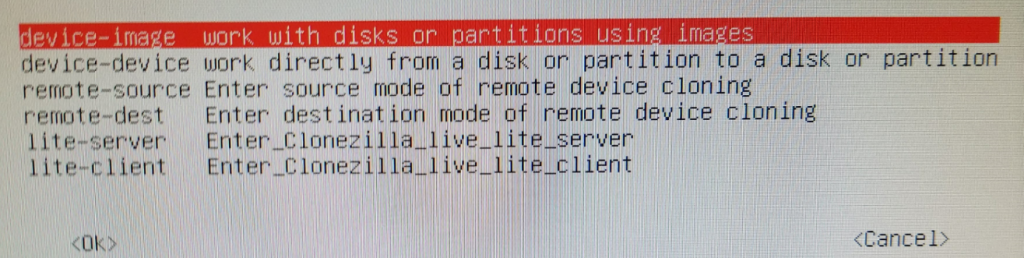
Select English > Don’t touch keymap > Start Clonezilla > device-image (Ok)
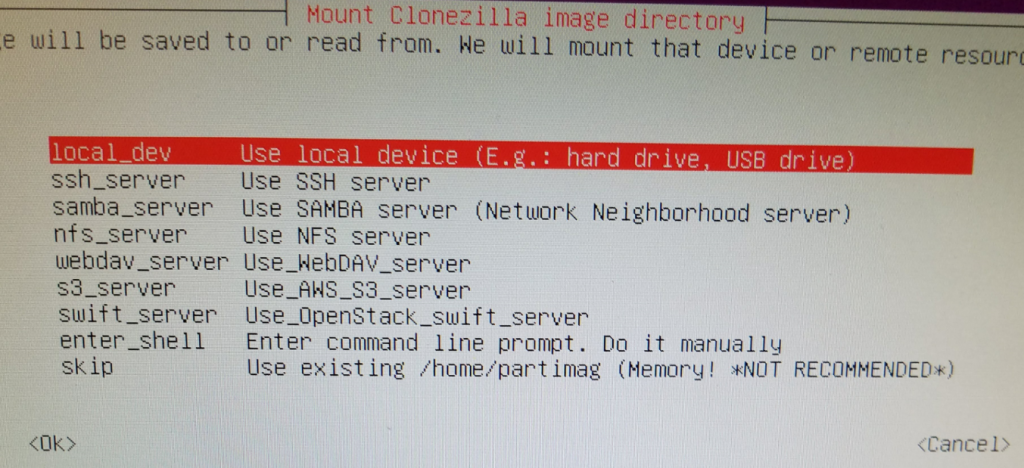
Under Mount Clonezilla image directory, choose Local_dev (Ok)
Press Enter to continue.
Review the clonezilla Scan disk preview to ensure it’s found both your Source and Target hard drives:
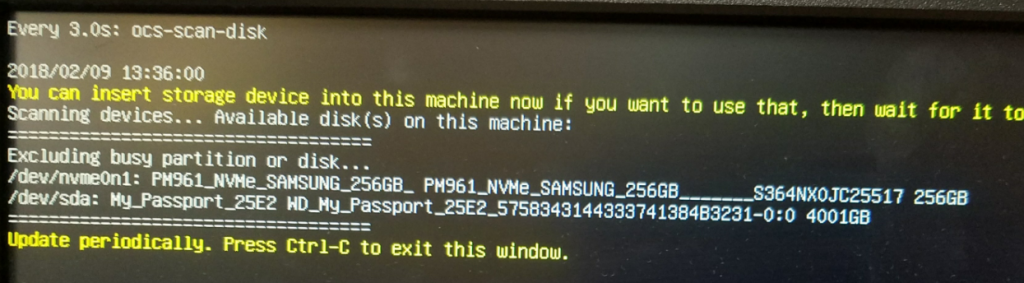
Press Ctrl-C to continue.
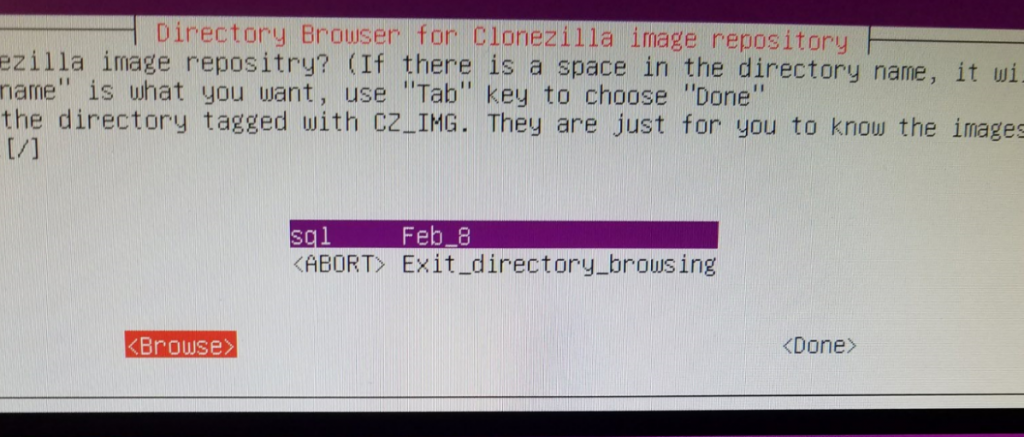
Arrow down and select your large external USB hard drive (sda1) to set the location of /home/partimg . This is where the clone image will be stored.

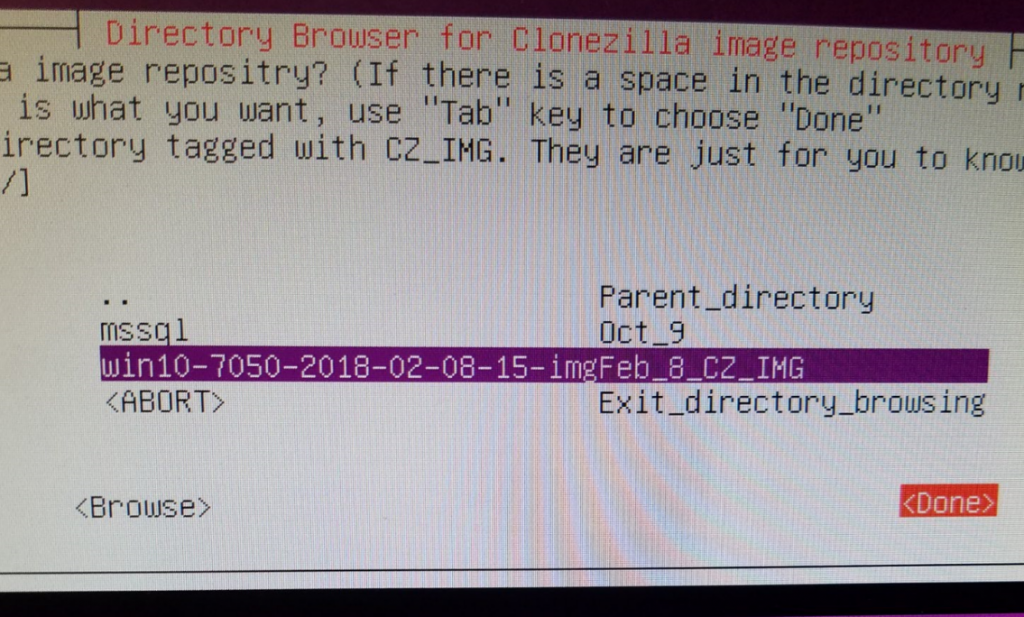
In the Directory Browser, hit “Browse” and go to your Parent Directory (top-most level) and select Done. This is where your image will be saved. You can see in my screenshot I’ve already saved an image here.
You will get a Summary location of Source (dev/sda1) and Target (/home/partimag). Press Enter to continue.
Choose Beginner mode
Choose Save Disk (Save_local_disk_as_an_image) – in my previous experience with Clonezilla, using normal spinning HDD’s and even SSD’s, I’ve used Samba to save my images to a separate server over the network using gigabit ethernet perfectly fine. However, in the case of these new computers and hard drives, I would get a permissions error when selecting SAMBA/SMB 2.1. The imaging would begin to take place and a couple smaller partitions would copy, but as soon as the primary large partition started it’s copy, I would get the permission error and the clone would halt. This is why we are using a local external USB hard drive.
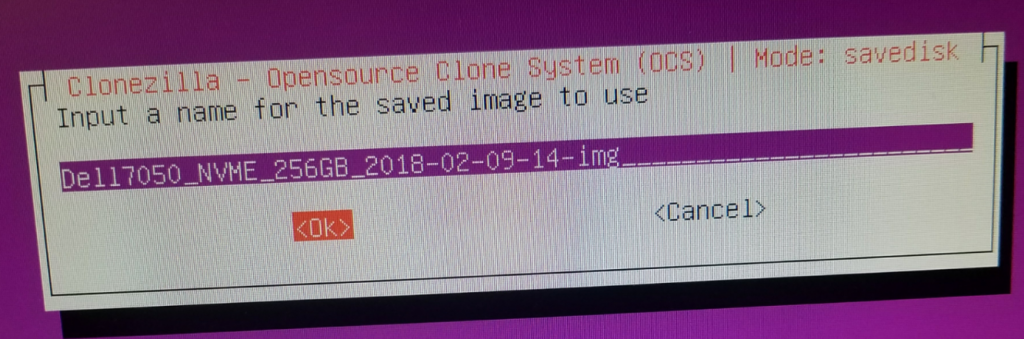
Give a descriptive name for the image (Dell7050_NVME_256GB_DATE-IMG) hit OK.
Select the local disk as source (should only be one here)
Select -sfsck (Skip Checking)
Select Yes, check the saved image
Select -senc Not to encrypt the image (or encrypt if desired)
Select Action to perform when everything is finished: -p power off.
Press Enter to continue, (Yes/Yes) – the image process will run and the image of the Source PC will be written to the External USB HDD. The machine should shut down when complete.
Image Target Computer
Now that we have our image saved on our external HDD, we can image our Target PC. On the powered-off PC, Connect the USB thumbdrive, External HDD, keyboard, mouse, and monitor, and again Boot into the BIOS.
On the new target computer, we want to again change the BIOS settings to mirror those we made in steps 11., 12., and 13.
After saving the BIOS, restart and hit F12 again, select the USB thumb drive, and boot Clonezilla.
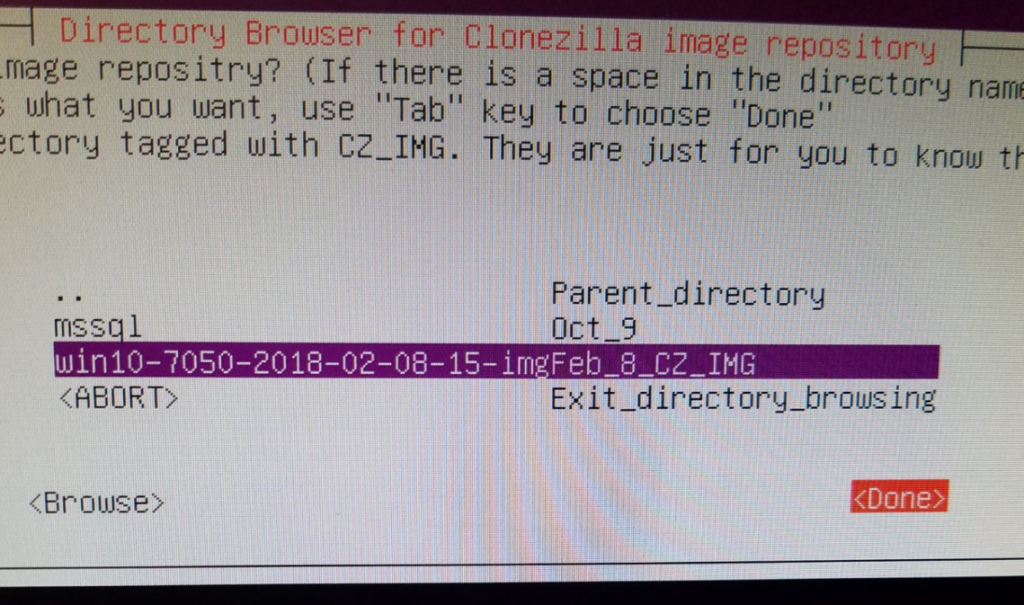
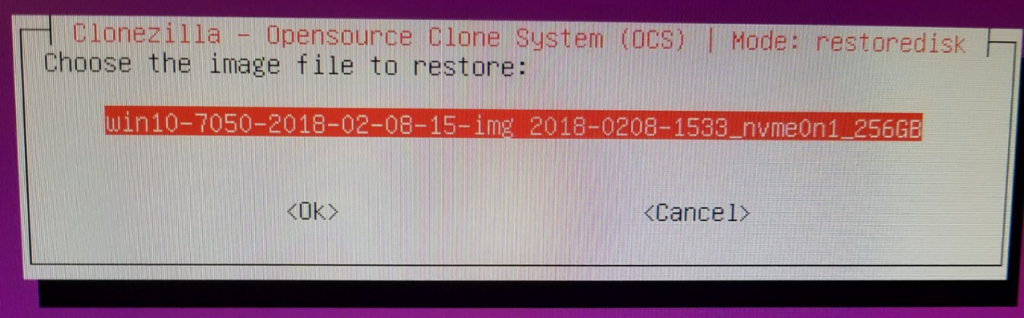
Start Clonezilla > Device Image > Local_dev > select image repository (sda1) > in Directory Browser, browse to the image we created, highlight it and select Done:
Choose Beginner Mode > Restore Disk:
Choose the image to restore:
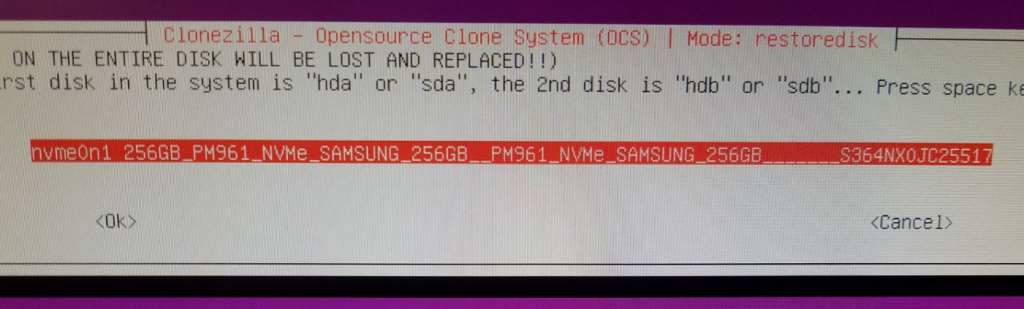
Select the target disk to restore onto (Should only be one listed here):
Select “Skip checking the image before restoring” > poweroff > Enter >
Heed the warning here. If important data is on the target disk, do not proceed. All data will be overwritten:
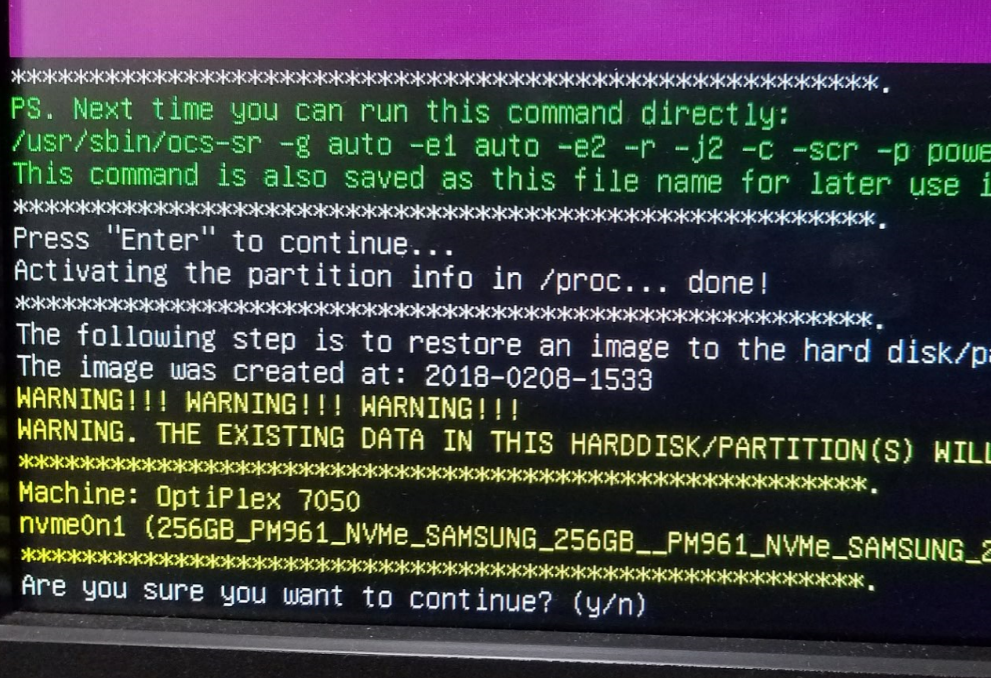
Hit y (enter) > y (enter) >
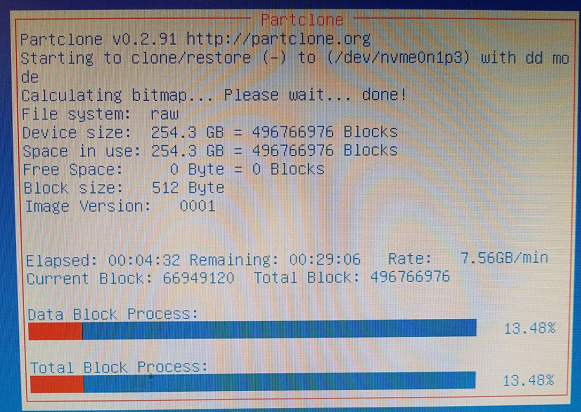
Partclone will run, clone the image to your disk, then shut down:
With the system powered down, remove your external HDD and boot thumb drive.
Power on the newly-imaged PC, hit the F12 button to go into the BIOS again. Reverse the changes made in steps 11, 12, and 13. Save the BIOS settings, and boot normally into windows. Congrats, you’re done! Hope this helps someone clone their newer systems with Clonezilla.


Commenti
Posta un commento
Solo soluzioni pratiche e/o suggerimenti, migliorie, proprie esperienze. Grazie